
Concrete driveways have now been a popular design option for homeowners that wanted to create and achieve a dramatic difference in a home landscape. Aside from this, it can also increase and enhance the resell and property value of a home.
Over time, concrete has now become an excellent material for the construction of such a driveway. Aside from its appearance and versatility, concrete became a more appealing option due to its durability and low maintenance. The market now offers a wide range of concrete designs to choose from. Homeowners either choose to undergo a small DIY concrete driveway project in order to save or opt to get home services like those done by an expert or contractors within their location, however, either of them is viable as long as proper research is done.
Related: Find A Concrete Company
Typically, on a small-scale project, concrete is unchallenging to work with, but on instances like installing a concrete driveway, it is quite a challenge. Though it is possible to do it yourself by just pouring all the concrete at once, on driveways more than 20 feet long, it is recommended to consider breaking it down into smaller manageable sections using 2 by 4’s. After all, the attractiveness and longevity of the driveway are achievable with careful planning and preparation. Aligned with this, installation method, environmental conditions, and proper care and maintenance from time to time should be observed and such driveways can last anywhere between 25 to 30 years.
The steps provided below are the perfect guide on how to successfully install in sections a concrete driveway.
Step One: Build the Forms
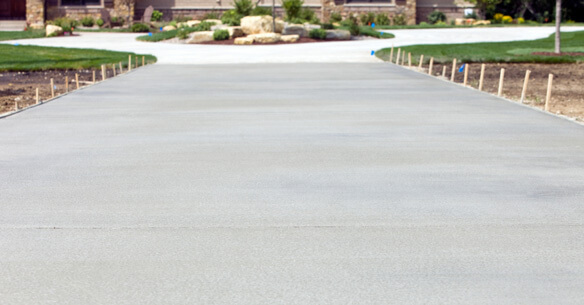
The first step is to build the concrete forms. Place wood stakes every 3 feet along the driveway’s outer perimeter, with the tops of the stakes 6 inches above the ground. If the driveway slopes down to the road, tie string between the posts at 4 inches above the ground to keep them level, and if the driveway slopes down to the road, follow the ground contours. Curve the stakes outward on each side of the driveway where it hits the road curb to make entry and leave simpler.
Cut the plywood panel in half lengthwise and bend one part for each side of the driveway entry, securing it to the posts with nails. Set the 2 by 4 boards in the ground inside the lines made with the stakes and twine, then use two-headed nails to secure the boards to the stakes. For easy removal of boards after the concrete has been set, apply a generous amount of motor oil onto the sections of the boards that will meet the concrete.
Step Two: Mark the Sections
Now that the forms are installed, sections now should be marked. Mark the first 10-foot long portion of the driveway with a cross-board of 2×4 planks the same width as the driveway section. Fit the board between the two parallel boards down the driveway sides, and make sure the cross-board is at 90 degrees to the sides. Place a level on top to ensure that it is completely flat before moving to the next section, make sure to not nail the cross-board into place as it will be moved to into the second segment.
The process should be repeated until all the sections have been marked. Once all sections have been established, place reinforcing bars at 3-foot intervals and position them 2 inches high above the driveway base, placed on pieces of stones or bricks.
Step Three: Pouring Concrete into the Forms
Before pouring concrete into the forms, the gravel base should be damped thoroughly. To create a stronger concrete slab, providing the gravel base with enough water will buy time to prolong the finish time and slow down the curing process of concrete.
Begin laying the concrete in one corner of the form while a helper spreads it out with a shovel or hoe. The assistance of one or more helpers may ensure that the concrete is level before it dries.
With a square shovel or mortar hoe, pour concrete up against the form and ensure it is compact into all corners. Pushing motion is highly recommended while overworking the concrete with dragging and spreading it too far may cause problems for the concrete driveway. Instead, space out the batches along with the form, stacking them one on top of the other to fill such a form.
Step Four: After Pouring Comes Striking
After the concrete has been poured, the striking process is next. To level the concrete, move a strike-off across the form. Make two passes with the board, move and control it slowly along with the form in a side-to-side sawing motion. Two workers will make the process faster and more efficient, even on narrow forms. If necessary, a third person can shovel extra concrete into any corners to save time. This process is vital to achieve and control the desired surface.
Step Five: Smoothing the Surface
After striking off, for initial finishing, a darby or bull float may be used depending on the project size. This will help smooth down and avoid forming the high spots and fill small hollows that are left after striking off.
As for using the darby, move it in overlapping arcs, then repeat with overlapping straight and side-to-side strokes. Ensure that the tool is flat in the entire process while avoiding it to dig in the concrete.
For larger jobs, a bull float can be used. The tool should be pushed away while the leading-edge raised slightly, then pull it back nearly flat as it overlaps the strokes.
Step Six: Edging Concrete
Providing the concrete driveway sections with curved edges will prevent tripping incidents and chipping. In creating the edge, a mason’s trowel should be run in between the borders of the form and the cement, and to finish the job, follow it up by using an edger.
The edger will ensure that the concrete is compact with a back-and-forth motion. While edging, keep a hand float nearby to remove any ridges left behind by the edger.
Step Seven: Create Control Joints to Minimize Cracking of Slab
Large slabs of concrete tend to crack and while it is impossible to avoid cement from cracking, areas that tend to crack may be controlled. It is necessary to create control joints with a groover that would provide separate sections no larger than 8-feet by 8-feet for 3 12 inch thick slabs and no larger than 10-feet by 10-feet for 5 1/2 inch thick slabs.
The surface of the control joint should be carved at least one-fourth of the depth of the cement. Although a groover is most commonly used for this phase, the joints can be cut by using a diamond blade saw one day after pouring.
Step Eight: Finishing Touches and Curing the Concrete Driveway
A nonslip surface can be created by running over a broom to the concrete. The texture should be between rough and coarse, enough to provide traction. As for the curing process, the concrete driveway can be strengthened by either spraying water on it for a week or sealing the concrete by applying an acrylic cure spray. It is recommended to wait 3 to 4 days to walk on it and 10 days for a vehicle to drive over it.
The bottom line is that the quality of a completed concrete driveway always depends on the workmanship put through it. The technique of pouring a concrete floor into sections extends the life and health of the concrete, such a method is helpful as well to do the project by yourself. The longevity of the concrete driveway starts with observing the proper installation methods and materials, together with thorough maintenance or immediate repair from time to time. If you want to build concrete that will last get in contact with Concrete Tampa Solutions.